Showing posts with label do it yourself. Show all posts

Wednesday, November 7, 2012

Weekly Manicure: Interview Appropriate Polish

As you (might) know I am an HR professional. Today I will be coordinating another entry level career day, wish me luck... One of the things that I stress to the attendees is that they should come dressed in professional attire. Naturally they all show up in their best suits (or the closest thing) but, there is more to your personal appearances than the clothing you wear. Men need to comb their hair and shave, ladies should do the same equivalent. You want to be the most polished you that you can be especially because a shrewd HR professional will make their first impression based on all those things; Don't forget the little stuff!

One of the most forgotten things for some ladies is giving yourself a neutral manicure or any manicure at all. Personally I am always aware of the fact that I might have to shake hands with more than one interviewer so, why not put a pretty polished one forward? Today I am leading by example with a simple and subtle manicure. Enter Sally Hansen Salon Effects in Tutu Much! While this isn't the most fun manicure strip I could pick it is perfect for making a professional impression. What kind of manicure would you give yourself if you had an interview on the horizon?


Don't forget to enter to win a $100 gift certificate from Shopbop! 

Monday, October 8, 2012

Weekly Manicure: Oxblood

I have had every intention of doing something spectacular with my nails for my manicure this week but, I have been busy sick and entirely unmotivated. I was long overdue for a manicure but, instead of busting out the makeup spongesloofahs, or old maps I went in the completely opposite direction and grabbed some manicure strips. Do you think that falls in the category of ultimate laziness or savvy convenience? For my sake let's just say it's the latter...


I went with a shade of maroon called Red Velvet from Incoco but, doesn't it remind you of the quintessential Fall 2012 color? Yup, this shade is SO oxblood! For better of worse I'm not going to look at maroon, burgundy, wine, claret, rosewood, or carmine the same way. Regardless, they are prefect for fall and I am in love with the color, perhaps I am being brainwashed. Have you fallen for oxblood yet?


Normally, I have an extremely positive experience with Incoco manicure strips but, this time they were chipping after the third day. I wonder if it's because I have had this set of manicure strips for a while (think Christmas gift). Have you ever used an older batch of Incoco manicure strips and had a similar experience or did I do something wrong?

Don't forget to enter the giveaway for a New York Fashion Week Swag Bundle!

Tuesday, September 11, 2012

Weekly Manicure: A Classic Combo - Neutral Nail, Bold Toe

When I think of a versatile and neutral manicure nothing comes to mind faster than a classic French manicure. When I want thinking ahead to all the activities and events I have going on because of Fashion Week and life in general I wanted my manicure to last and be appropriate through it all; Enter Incoco French manicure nail strips! I've tried them before and know that they are fantastic so it was really a no brainer to go that route again. I did them last week and they are still perfectly presentable in all situations despite the everyday wear and tear of my life.


While I love the French manicure there was still the question of what to do in terms of my pedicure. I don't know about you but, I think French pedicures look weird; Kind of like the toe nails are too long or the person is trying to highlight their natural toe which doesn't work for me since I'm not a huge fan of feet in general... I could come up with a bunch of reasons but, in the end, I just don't like them and wouldn't elect to  paint my tootsies that way. O good, I'm not the only one! Instead I went for a dark purple color which screams fall to me. I sense a manicure in that polish's future sometime soon but, not too soon... summer isn't  over yet! What color did you paint your nails this week?

Monday, August 13, 2012

Weekly Manicure: Lilac Polish, Silver Accent Nail

Guys, I have to be super honest. I am in LOVE with my manicure this week; Every time I move my hand it catches my eye. Lilac is one my favorite warm weather manicure colors and this particular shade (Revlon Colorstay Provence) is absolutely perfect. While it would have been ok to rock the pseudo neutral lilac manicure I thought it best to spice it up with an accent nail, that really pulled the whole thing together. Although, I think next week I am going to skip the polish and try nail strips again... decisions, decisions. Which one do you prefer for your own manicures?


Monday, July 9, 2012

Weekly Manicure: Zoya Summer 2012 - Arizona

This past Friday I stopped to pick up some flowers at a local bodega for my boss' birthday (I'm nice like that) and I saw the most beautiful peach roses. I have had peach on the brain and after seeing the lovely flowers that was the polish color I was craving for this week's manicure!


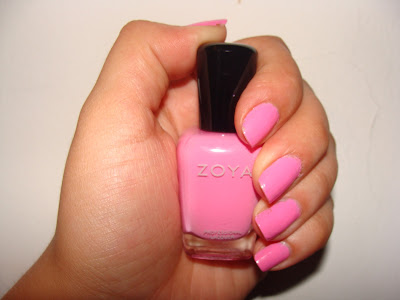
I ended up skipping the store and searching through the loads of polish I already have to find something in the same color family... No, a bright orange manicure is not the same as a peach one but, it was enough to fill that craving for now! I thought about mixing Zoya's Arizona with a white polish to create the desired shade I had in mind but, that last time I did that my nails weren't drying. I guess you can mix colors but, only if the polishes are similar formulas... What color are you rocking for your manicure this week?


Sunday, July 8, 2012

FBFF: Manicures, and Pedicures, and Nails... Oh My!

I'm sure you've noticed that I have really gotten into doing my own nails. After looking at some amazing nail  blogs I thought, "Everyone has to start somewhere" or "Practice makes perfect" or some combination of those things. That feeling combined with my new(ish) found inability to spend money has been an inspiration and motivated me to lacquer it up.


While simply painting my nails is great practice I have also been trying to mix it up: making my own colors, trying out different types of polishes, using different patterned nail strips. I know it's nothing crazy but, everyone DOES have to start somewhere!  

Wednesday, July 4, 2012

Weekly Manicure: Accent Nail


This week's manicure was really all about complementing the ensemble that I wore to my cousin's wedding on Saturday. Sure, I could have gone with a classic french manicure but, I wanted my mani/pedi to be a little more interesting. Of all the fun manicures that I have tried I haven't done the whole trendy one accent nail thing and that seemed like a good option. I wanted to use baby blue and silver nail polish so it complimented my labrodorite jewelry as opposed to purple or pink which would have been beyond matchy matchy. I think the manicure came out great and it went perfectly with my dress. What do you think?

Tuesday, June 12, 2012

Weekly Manicure: Incoco Champagne French Manicure

This Last week I needed a polish change. With so many choices in my nail polish arsenal I wasn’t really sure how to proceed so I decided to keep it simple. You guessed it, a french manicure. Thankfully, I had some Incoco french manicure strips to make the process easy and frustration free. How do you think the french manicure came out? Really, I think it’s fab too! I also came to an unexpected realization about how long my own natural nails have gotten.


I have a confession. When I was younger I used to bite my nails and it was bad! I’m not quite sure why I felt the need to gnaw on my fingers or why it continued as long (into college) as it did but, it did. There were stretches of time where I wasn’t compelled bite my nails (I was getting regular manicures or I had acrylic tips/wraps) but, the minute consistent stress or boredom crept up on me I found myself right back where I started.

Fast forward to now… I don’t really have problem anymore. I’m not quite sure how I kicked it. Maybe there is always something for me to do (thanks phone) or I’ve learned to cope with my stress differently; Your guess is as good as mine. But, when I went shopping with my mom this past weekend I (proudly) showed her my nails and we both marveled over the fact that I used to pay to have manicurists put acrylic on my nail to make them just as long as they are naturally. How times have changed! Did you ever have a problem with nail biting? How did you move past it?


Wednesday, May 30, 2012

Weekly Manicure: Kookoo for Coral

This utterly depressing, dour, and all around dismal weather has not completely destroyed my desire for warmer things. I am craving summer and could not think of a better way to channel that than with my manicure this week! Enter my favorite summer polish, Sally Hansen Complete Manicure in Kook-A-Mango (similar to my first coral manicure love Boat House by Essie)! I absolutely love the color, which is best complemented by tan skin and sandy surroundings. Normally, I would have thought twice before wearing such a bright polish to work but, after my boss was sporting a similarly carol manicure last week I felt fairly confident in my choice. What is your polish color of choice for a fun in the sun summer manicure?


Don't forget to enter the giveaway for a $100 Shopbop giftcard!
Don't forget to enter the giveaway for a free dress from eShakti.com!!

Friday, May 11, 2012

Work With What You've Got: Ripped Pants & Iron On Patches

No, this is not a post about the 90s...My skinny pants made a desperate cry for attention right before my shopping trip.  They must have been thinking that I would never wear them again because they decided to rip as I sat down on my couch, the sound was tragic, drama queen! It was almost as bad as what happened with my skinny jeans the day before but, that’s a story for another day. 


Apparently newer pants, skinny or otherwise, used regularly only have a shelf life of approximately two years. This has not only been my personal experience but, BF’s as well. Because of this limited shelf life and the new wardrobe revelations regarding work I decided that instead of shelling out $60.00+ for a pair of replacement pants from the GAP I would fix them with an iron on patch. Crafty Iris to the rescue! 

Thankfully they had the patches at my local CVS but, I’m sure you could pick them up if need be at any pharmacy or grocery store that has a tiny section of sewing goodies. Since the offending hole was on the inside of my thigh it didn’t matter if black of the patch wasn’t an exact match for the black of the pants. First thing was to sew up the hole to reduce the risk of any additional ripping. 


Then I placed the patch to cover as much of the hole as I could and ironed away. The instructions on the packet of patches said to do it on the highest heat setting with no steam. It was a fairly straightforward process. For some reason I got some discoloration on the patch but, it’s not really a big problem since no one will be able to see it unless I show them. Because the patch didn’t cover the entire hole I ended up having to cut an additional piece from another black patch to rectify the situation but, it all worked out.


I haven’t worn them yet but, I am sure my handiwork will hold up to the wear and tear of life and hopefully the washing machine. Either way, this endeavor has saved me a pretty penny. Have you gotten crafty with anything lately? Please share I’m always inspired when other people do creative things to make what they have work for them!

Monday, May 7, 2012

Weekly Manicure: Half Moon Cheetah

Last week I found my manicure in pretty good shape at the end of the week, despite the warnings from the Incoco kiosk person. The only major issue was the fact that my nails had grown a bit (as they tend to do) so, I decided to try something new instead of giving myself a whole new manicure


Enter, Half Moon Cheetah! Most half moon manicure tutorials tell you to start with a single color and then use some sort of round stickers to mark the half moon part while painting a second color on the upper part of your nail over the base color. Since I already had the color I wanted on the upper part of my nail I needed to try something a little different to get the desired effect. Using "old-fashioned" hole protector stickers I laid out a half moon shape at the bottom of each of my nails. It was a little tricky on the bigger nails (ex: my thumbs) but, I by cutting them in half a bit off center I managed to finagle them into a shape that worked.


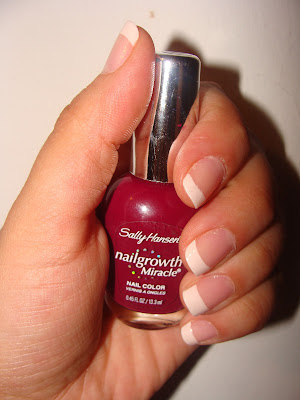
They were was perfect for the task at hand and I painted a few coats of Sally Hansen's Nailgrowth Miracle in Wholesome Earth  in the half moon shape at the bottom of my nail and violá an easy, do-it-yourself half moon manicure!


One of the things that I would be cautious about is making sure that the area you paint is very dry before you remove the stickers or you might mess up the edges. You could seal it with a top coat if you want but, I didn't and it was fine. This is an excellent way to spice up your existing manicure and make those nail strips last one week longer if they are holding up to your daily wear and tear!


How do you think it came out?

Sunday, April 22, 2012

Weekly Manicure: Rawr

While I enjoy the options and creative possibilities that nail polish allows I have not yet perfected the manicure process to the point where I can avoid chipping. I think I am in line with what most would consider “best practice” but, still see my manicure falling to pieces (literally) after two or three days. What advice would you have to create or maintain a long lasting manicure? I’d be happy to put this into practice next week when I sit down and do my nails.

Based on this seemingly inevitable manicure disappointment over the past two weeks I have decided to go with Sally Hansen Manicure Strips this week to avoid (almost) immediate chipping. I picked this specific pattern up on complete impulse when I saw it at CVS. I just can’t ignore that lipstick nail polish effect especially when it’s something new and exciting. There have a bunch of fun colors/patterns in this Rock of Ages collection but, Rock N' Roar was the only one calling to me as I glanced over my options. Who can resist a good animal print? That’s right, nobody…


Ironically Sally Hansen Manicure Strips would be against the “advice” of a mall kiosk person I met last weekend. Let me set the scene: I was shopping with my cousin and giving consultative wardrobe advice. As we were crawling the malls near her I spotted a kiosk that sold Incoco strips and Konad plates. I was super excited because I haven’t had the option to buy either in person yet. When I walked over to browse I was immediately assaulted greeted and the salesperson asked if I wanted to try a sample. I said yes (to a Konad design) but, she assumed that I meant the Incoco strips and proceeded to try to remove the polish (gasp) I had on my nail.

The crisis was averted and she stamped my nail, it came out really well. I suggested that my cousin try the strips because of their convenience and ease of use. While I tried to tell my cous about my personal experience with Incoco the conversation was peppered with comments from the sales person. While I said they were similar to Sally Hansen she insisted they were nothing alike and that Incoco is superior. When I said they were both nail polish strips she said Sally Hansen was plastic and Incoco was seven layers of polish. When I said that they lasted for at least a week she insisted that it was more like 14 days. The only thing that she didn’t contradict me on was when I said that there were a lot of great patterns on the website. It was a very awkward experience especially since I am familiar with/an advocate of Incoco nail strips.

While I went Sally Hansen this time around I think my nails came out pretty well, don’t you?


Do you utilize manicure strips or do you think they are just a passing trend? If you do are you a Sally Hansen or Incoco person or do you use some cool new thing that I’ve never heard about?

Saturday, April 14, 2012

Weekly Manicure: Mint Sorbet

While I don’t own any mint colored clothing it is one of the Spring 2012 trends that is calling out to me. I was trying to think of a (cost-free/low-cost) way to bring more mint into my life when I remembered Essie Mint Candy Apple polish. That would be the perfect way to incorporate the mint trend everyday next week without breaking the bank or buying any new clothes. With no time to order, I decided to stop by my local CVS and see what I could find in their beauty department.

As expected I came across a few similar shades of mint green from Revlon and Sally Hansen. While I was excited that my plan was coming to fruition I was also overwhelmed with all the choices; Did I want Revlon Minted? How about Sally Hansen Nail Growth Gentle Blossom? Perhaps Sally Hansen Smooth & Perfect Color + Care in Sea? So many choices! I’m glad I stopped with those two brands. I ended up picking Sally Hansen Hard as Nails Xtreme Wear in Mint Sorbet. Why, you might wonder? Because, it was the cheapest one they had by a (considerable) margin; It was only $3.59, about half the price compared to other iterations of mint and most decent quality nail polish in general! I found it in a commonly overlooked place, at the bottom of the shelf. Don’t let stores trick you into buying the first thing you see! Take time and look high and low (literally) the best deals are normally in places that you wouldn’t check at all!


What spring trends (nail polish or otherwise) are you most excited for? 

Saturday, April 7, 2012

Weekly Manicure: Ombre

According to one of my fab friends who works in the magazine industry at very well know beauty/fashion publication nail polish is the new lipstick! What do I mean by that? Well, back in earlier recessions Leonard Lauder (chairman of Estee Lauder), consistently found that during tough economic times, his lipstick sales went up. Basically, we as consumers turn to less expensive indulgences, such as lipstick, when we feel less than confident about the future. Therefore, lipstick sales tend to increase during times of economic uncertainty or a recession. It has been a reliable measure over the years but, in this current economic mess that we find ourselves in it’s not lipstick that we are splurging on it’s nail polish and other manicure tools AKA the "lipstick effect" Do you think you are part of this phenomenon?

I can say that I am part of this trend without even realizing it. More recently I have been putting time and a little monies into my own mani/pedi fun. I am consistently disappointed when I splurge on a manicure at the salon only to have it chip within a day or two. Why bother spending the money on that when I can do it myself? And why not share it with you? I am always trying to spice it up so there will hopefully be some things that help/inspire your own manicure fun.

This week, I decided to take some inspiration from the official start of spring and do a manicure with one of my new fav warm weather colors, lilac! This is also in keeping with what my mother had planned for the family’s Easter ensembles, more on that later... I wasn’t sure if I should keep it simple or try something fun with it… I decided to try something new and attempt an ombre manicure. As I’m sure you know ombre is one of my favorite things and I’ve been watching video after video on how people make it happen… why can’t I? I used this ombre manicure tutorial from lizzypunch, it was the simplest to follow in my opinion and didn't require lots of polishes, sponges, etc.


The first step to a good long lasting manicure (ombre or otherwise) is starting with a very clean slate. It helps the polish to adhere to your nail.


I followed the steps that had been lined out in the tutorial but, there were a few tweaks that I would definitely stress. One of two drops of clear nail polish with a little color will work for every two/three nails but, I had to mix up a a few batches while I was in the process of doing the manicure. Also, a piece of aluminum foil works just as well as a small plastic container for your palette. 


This is the first layer which is 4/5 drops of clear nail polish mixed with 3/4 drops of color polish. One of the reasons why I might have had some challenges with this was because the polish is already a little sheer. You have to play around with your polish until you find the level of translucency/lightens that works for you.


For the next layer I used a few more drops of the lilac polish to deepen the color on top of what I had used for the first layer. I only painted that shade on half of each nail to give the fading ombre effect. It didn't really come out as definitively in this picture but, you can definitely make it out in the right light.


This is the finished product. I just used the lilac color without any additional clear nail polish for the tips. I also put a top coat which really helped smooth everything out but, only for the nails where I was able to go through the process quickly.What do you think of my ombre manicure?


Some nails came out more blended than others but, this was my first attempt at the ombre manicure. Have you tried it before, how did it work for you?  What do you think of my end results? Yes, I also did my toesies but, not in the ombre fashion. I don't think there is enough "canvas" to work with for that. They had to settle for a coat of Dr. Remedy's Lively Lilac.

Thursday, October 28, 2010

Wicked Alternative

I don't know if it is the same all over the country/world but, in NYC when the weather starts to cool down and all the stylin' ladies are heading to the salon for their weekly mani/pedi they turn to the quitessential Essie shade Wicked. At this juncture of extreme budget-ness, I can't really afford to be one of those people and I'm ok with that. But, I still really love that look and have found while trying to do my own nails that Essie isn't really the greatest polish; blasphemous maybe but, still true. And so began my search for an alternative product...

I really like Sally Hansen Complete Salon Manicure but, they just don't have the right color. You know; a maroon that is almost bordering on black in certain lighting situations but, is definitely still maroon. I have tried a few different things and have finally found a good quality product that is the perfect color. I wanted to share it with all of you just in case you have been on the hunt like me, you're search is over!


Sally Hansen Maximum Growth Plus polish in Wholesome Earth is the closest thing that I have found to Wicked so far and I am loving the color. The polish is good quality, no serious chipping (impressive since I have a very keyboard keavy job) or streaking. The only thing that took some getting used to was the brush. I prefer something thicker but, once you get the hang of it that's not an issue at all. Unfortunatley while looking for a place to buy it online I learned that it has been discontinued! Bummer, I am fighting the urge to head back to Target and buy every bottle... I guess my search isn't really over.

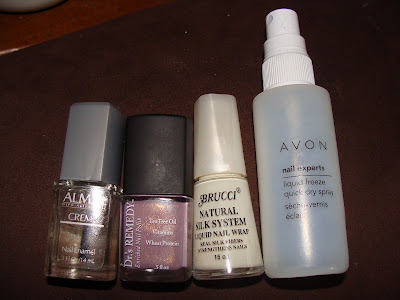
Lots of bloggers have great advice for easy do-it-yourself manicures. My biggest piece of advice on that front is, practice makes perfect! Also, use good products. I'm not saying you have to go out there and buy extremely expensive things, just stuff that does a good job. I am loving Sally Hansen Complete Care 4-in-1; it is my basecoat, my topcoat, or just a clear polish on my in between days. I am on my second bottle guys, no joke, it's good stuff! Another thing that you can find at salons in the city is super quick dry drops because not all of them are set up with dryers. This is another product I recommend if you're like me and have the patience of a two year old. I have been searching for a good one for at least a year and was lucky enough to find some at the local drugstore, Revlon Liquid Quick Dry will save me from many future smudges! It's not instantaneous drying but, within five minutes or so things can be back to normal.


Because blogging can be a business, I would just like to finish this post by saying that I did not recieve any compensation for anything I said about these products. I purchased everything on my own and am just sharing my humble opinion.

Tuesday, August 31, 2010

Work With What You've Got: Secondhand Dress

A while ago one of my aunts, Titi I (no we don't have the same name), gave me this dress. She said she didn't like the way it looked on her and that she thought it might be perfect on me. The problem was that when I got the dress it was at least three inches longer. Mid calf length dress and skirts are not something that I find flattering, it's an awkward length... What made the dress even more awkward was that the extra fabric on the bottom was the printed pattern from the top half (trust me it looked wierd) What to do?

It was simple! I just removed the bottom panels and now the dress hits just below the knee. I was going to hem it because the edge is a little raw but, I haven't gotten around to it (you couldn't even tell could you?) I wear it either way! Since then it has become one of my favorite outfits to run errands in when the weather is warm. I just thrown it over my head grab some flip flops and I look put together but, am super comfy... the perfect combination! Thanks Titi I!
  • Top: printed dress, Magic; gift from Titi I altered by me; tank top underneath for the modesty
  • Shoes and Accessories: purple flip flops, Bitten via Steve and Barrys

Saturday, May 1, 2010

Work With What You've Got: Pants

As I have said before I am trying not to shop as much and work with what I already have in my closet. For example: my favorite cuffed stretchy pants from New York and Company. Unfortunately there is a problem with these pants (in all colors except black, wierd) when I bought them they fit perfectly but, after a few washes they shrunk and in the strangest way. I can still fit into them no problem but, if I wear the at my waist-ish area they are wayyy too short. At first I had disillusioned myself into thinking that the almost flood length pants were fine the way they were and continued to wear them. After some funny looks from people I realized that I was sooo wrong!

When I noticed my co-worker Patricia wearing the same exact pants that I owned (and was going to donate) I mentioned that she should be careful how she washed them because they were notorious for shrinkage and she nodded knowingly pointing out that fact that she had had the same problem and had taken the cuffs down. I hadn't even noticed her INGENIOUS fix at first glance! So I have decided to undertake that project and I took a few pictures. I think it's going along quite well don't you? When I wash/iron them the fold of the former cuffs won't be as noticable. Thanks Patricia!! This is a perfect example of doing what you can with what you have.