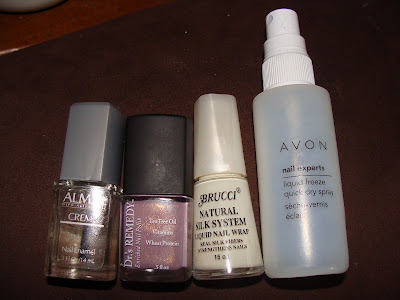
I can say that I am part of this trend without even realizing it. More recently I have been putting time and a little monies into my own mani/pedi fun. I am consistently disappointed when I splurge on a manicure at the salon only to have it chip within a day or two. Why bother spending the money on that when I can do it myself? And why not share it with you? I am always trying to spice it up so there will hopefully be some things that help/inspire your own manicure fun.
This week, I decided to take some inspiration from the official start of spring and do a manicure with one of my new fav warm weather colors, lilac! This is also in keeping with what my mother had planned for the family’s Easter ensembles, more on that later... I wasn’t sure if I should keep it simple or try something fun with it… I decided to try something new and attempt an ombre manicure. As I’m sure you know ombre is one of my favorite things and I’ve been watching video after video on how people make it happen… why can’t I? I used this ombre manicure tutorial from lizzypunch, it was the simplest to follow in my opinion and didn't require lots of polishes, sponges, etc.
The first step to a good long lasting manicure (ombre or otherwise) is starting with a very clean slate. It helps the polish to adhere to your nail.
I followed the steps that had been lined out in the tutorial but, there were a few tweaks that I would definitely stress. One of two drops of clear nail polish with a little color will work for every two/three nails but, I had to mix up a a few batches while I was in the process of doing the manicure. Also, a piece of aluminum foil works just as well as a small plastic container for your palette.
This is the first layer which is 4/5 drops of clear nail polish mixed with 3/4 drops of color polish. One of the reasons why I might have had some challenges with this was because the polish is already a little sheer. You have to play around with your polish until you find the level of translucency/lightens that works for you.
For the next layer I used a few more drops of the lilac polish to deepen the color on top of what I had used for the first layer. I only painted that shade on half of each nail to give the fading ombre effect. It didn't really come out as definitively in this picture but, you can definitely make it out in the right light.
This is the finished product. I just used the lilac color without any additional clear nail polish for the tips. I also put a top coat which really helped smooth everything out but, only for the nails where I was able to go through the process quickly.What do you think of my ombre manicure?
Some nails came out more blended than others but, this was my first attempt at the ombre manicure. Have you tried it before, how did it work for you? What do you think of my end results? Yes, I also did my toesies but, not in the ombre fashion. I don't think there is enough "canvas" to work with for that. They had to settle for a coat of Dr. Remedy's Lively Lilac.


No comments:
Post a Comment
Thanks for your feedback! I really look forward to hearing from you...